To add a new policy navigate to the Policy Folder where you wish to create the Policy and use the Actions/New Policy option if your profile allows you to add Policies.
IMPORTANT NOTE: If you are carrying out a Policy Review then you should leave the existing 'live' Policy in the Current Policy Folder and create a NEW version in the 'Policies Under Development' folder. This ensures that all comments and approvals are captured against the new version until finalised whilst the 'old' version remains active.
Ideally Policies are created in Policy Folders (use Actions/Folder Properties to check) but they can also be created in Standard Folders (the dates etc will not be as obvious)
The 'New Policy' screen will open up with a series of options that need to be completed.

In detail..
1. Policy Name - this will appear in any lists or reports about this policy including the 'Public Viewer'

2. Policy Type - the options here come from the list defined in the GVO Settings by the local GVO Manager (if the list needs amendment please contact your local GVO Manager). The Policy Type is useful for search and reporting purposes.

3. The Board - this is a drop-down selection to link this Policy to a 'Board' (in a single school there is only one option, in a MAT there will be a board for the Trust and one for each school). This is used if the policy is to be published on the school or college website.
NOTE: To link a Policy to a 'Board' the user adding the Policy MUST be a member of that Board otherwise a blank list (N/A) will be displayed. If the person managing policies is NOT a board member (eg Administrator, Business Manager) then this restriction can be overcome by adding the facility to their user profile (the GVO Manager needs to do this).
The setting required in the profile for a non-board member is shown here...

4. Policy Status - this is usually 'Draft' for Policies being developed or reviewed or 'Final' when the policy is approved. The list of Draft and Final options can be managed by the local GVO Manager but often Draft and Final are the only two options used.
A Policy CANNOT be published publicly unless the status is from the 'Final' list.

5. Statutory Policy - select this if the Policy is 'Statutory' - this will be used in the search and reporting features of GVO.

6. Approvals Locked - when a policy is first created this will be 'unchecked' to allow Governors/Trustees to mark their approval. If this option is ticked then no further changes to the Approvals list can be made.

7. Publish Publicly - if this option is ticked then this policy will be published on a public area to be used from the school or college website. The website address for the School/College Policy viewer is shown on the 'Board' page and also on each published Policy (one URL per school/college). There is a web address for policies for parents, for staff and for students. Policies can be flagged to be published to any combination of the three address.
The Policy will only by published if the following criteria are met:
a) It is flagged to be published
b) The status is from the 'Final' list
c) The Approvals have been 'locked'
d) The folder where the policy is stored allows policies to be published (this feature is to allow Historic Policy folders to be 'switched off'.

8. Effective Dates - these are the Effective from/Expiry dates. The expiry date is used to generate warnings when the Policy is due for the next review (normally warnings are issued 60 days before the expiry date - this number of days can be changed by the Manager in GVO Settings).
The second checkbox is to determine if the Expiry date should appear on the GVO Calendar (recommended)

9. Policy Owner - this can be an individual, several individuals or a 'group'. All the people classed as 'owners' will receive warnings in the weekly newsletter as the Policy nears the review date (the default is 60 days before the policy end date - this can be adjusted in the Settings area by the local GVO Manager). Use the 'Select' button to select the owners for this policy

Note: Policy Expiry Dates will also be shown on the home screen to all users who can see the policy 14 days before the policy expires. The Policy Expiry will also be on the Calendar (if that option is set).
10. Description - an open text area for any supporting information (eg updates from previous version)

11. Access - this allows the policy to have restricted access if there are confidential aspects during the development of the final version (rare).

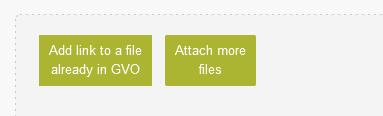
12.Attached files and links
This is the area where the actual policy document is attached - ise the 'Attach new file'. Multiple files can be added if necessary (eg Appendices). PDF versions of the attached files will be visible in meeting packs and public viewers, links will not).
Note: Files must be added in a 'supported' format so that a PDF preview can be generated.
The MS Office file formats which currently have preview capability are:
.doc / .docx / .xls / .xlsx / .ppt / .pptx
Other files that are previewable without needing any conversion first are:
.gif / .png / .jpg / .jpeg / .bmp / .pdf such as WORD, PDF, XLSX, JPEG, PPT, BMP
Basically all 'common' formats are supported but other formats (eg ODT, RTF, PUB and WORD Templates (.dotx files)) are NOT supported and no preview will be generated. If there is no Preview then nothing can be published onto the website via the public viewers.
Note: When a file (policy) is attached initially it will have the same name as the file loaded but you can change this in the 'name' box.

Press Submit when done.
Note: If the Submit button is 'greyed out' this usually means a mandatory field (eg the Title, dates) have not yet been added.
EDITING A POLICY
As the policy is developed there may be comments or suggestions to change it prior to final approval or a simple typo may be spotted in an already approved/final policy.
When a new version of the attached file (or files) is ready then the old version can be replaced using the steps below...
- Go to the policy where you wish to make the change
- Actions/Edit Policy
- Go to the section where the 'old' attached file is show and press the 'delete' button ...this will highlight in red and flags this version of the attached file for deletion when you SUBMIT the changes

- Use the 'Attach more files' button to attach the updated policy document
This will then look like this with the 'old' version ready to be removed and the new version ready to add...
- Press Submit - the old version will be removed and the new version attached.